
Click template below and save as image to download the Church template.
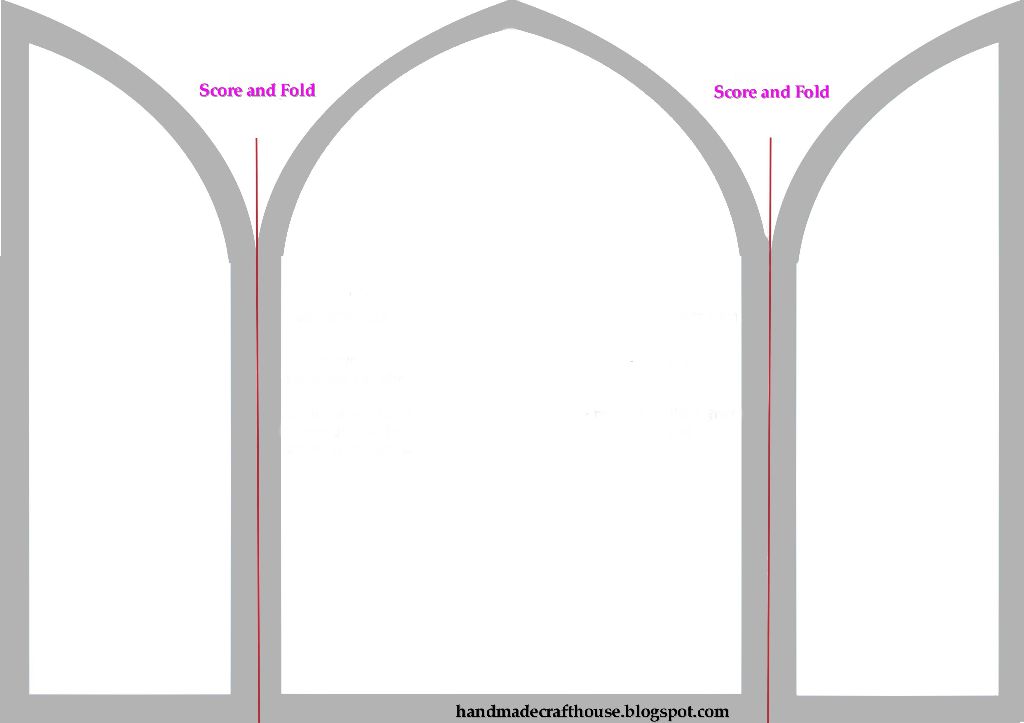
To print: select - landscape then select - to fit all. Once I printed the template
I attached it the dark card stock and cut around the gray outside lines.

Fold the two flaps inwards and I sanded the top of the card to get the church shape I wanted.

With the template I cut the two flaps and attached this to the light card stock with tape.

With scissor and a trimmer, I cut in the inside of the gray lines.

Sand the tip parts of the door to form it's shape.

With double sided tape I attached to the base of the card.

I punched out two crosses in gold cardstock and placed them in the Xyron to get adhesive
the back of the crosses. I attached them to the lower part of the church doors.

I used my Big Shot for the bird and attached it to the top part of
the church doors with double sided tape.
To complete the card I opened the two doors of the church and attached
a message inside.
No comments:
Post a Comment