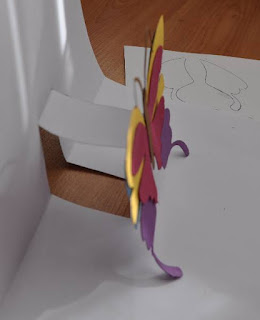
Butterfly Card
I tried digital stamping for this butterfly which enabled me to print the image to any size onto card stock. I sponge the image with Stampin' Up! inks and used script as a background. For the final touch I used Crystal Effects - 101055 to add dimension. I totally enjoyed making this novelty card.
Birthday Cakes
If you love the birthday cake stamp you can earn this as part of a Stampin' Up! set-Birthday Bakery (level 1). All you have to do is have a workshop or book order up to $300 and it's yours for free. Check it out on the current Stampin' Up! 2010-2011 Idea Book and Catalogue pg10.
Happy Birthday With Distress Inking
I used distress inking technique for this card to give the compass an aged look-totally fun. The lower part of the card I used the BIG Shot Machine running a textured plate and the Happy Birthday is part of the FREE stamp sets you can earn from the Sale-A-Bration promotion that Stampin' Up! have til 31st March for more details on sale click Here.
Stampin' Up! Materials
Stamp Sets: Punch Bunch (sale-a-bration 2011) wood-123288 or clear-123211
A4 Card Stock: Whisper White-106549, Very Vanilla-106550, Chocolate Chip-108599
Classic Stampin' Pad: Chocolate Chip-100908, So Safron-105213, Real Red-103133
Tools: Big Shot Machine-113439, Textured Impression Square Lattice-119976 (Summer Mini Catalogue 2011), Scallop Square Extra Large-119884, Snail Adhesive-104332, Gold Brads-104337Others: Compass Stamp
Pop-Up Butterfly Tutorial
Select the size card stock you require, I used A4 paper as an example.
Fold in half length ways.
Draw rectangle shape measuring 5cm x 2.5cm. This measurement can change to suit your needs.
Cut the two lengths.
Score the top line of rectangle then do the same on the other side.
Remember NOT to cut this line.
Fold it back and do the same on the other side.
Open sheet up.
Push the piece through towards the inside of card.
This piece is what makes the card pop-up.
Attach another sheet at the back of the pop-up and down it's ready to decorate.
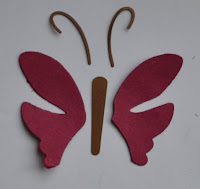
 To make the butterfly I used diecut-Sizzix Butterly Parts #1, Set #2 through the Big Shot Machine
 To start with you need these 6 pieces plus body.
Attach pieces together onto body.
Then you require these 4 pieces for second sage of butterfly
Attach the two pink wing on top.
With double sided tape attach body in center, pairing the two bodies to match.
To secure antenna's place them in between body.
Subscribe to:
Comments (Atom)
Stamped Images © 1990 – 2008 Stampin’ Up!®
Artwork by Sandra Berlinski. All content is the sole responsibility of Sandra Berlinski, Independent Stampin' Up!® Demonstrator and the use of and content of the classes, services and products offered on this web site is not endorsed by Stampin' Up!®


