Pages

Clear Mount Rubber Stamps


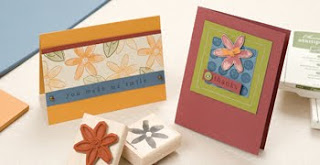
Over the past few years, there has been enormous demand from demonstrators and customers alike for a line of repositionable clear-mount rubber stamps. Well, you asked for it, and now you have it! Starting with stamps in the 2010 Autumn-Winter Mini Catalogue, Stampin' Up! now offers our exclusive stamp art in both traditional wood-mount, and the new clear-mount option.

Our new clear-mount rubber stamps are the result of extensive research with the intent to maintain the very best image quality in the stamping industry, while at the same time offering the ease-of-use and storability inherent in repositionable clear-mount rubber stamps.


Clear-Mount Rubber Stamp Features
  • Nine different sizes of clear blocks available individually or as a discounted bundle.
  • Blocks have ergonomic grooves on all four sides for easy grip and traditional wood-mount feel.
  • Stamps and blocks are durable and easy to clean with your Stampin' Scrub and Stampin' Mist.
  • Optional image labels on stamp backs let you decide if you want to see the image through the block or not.
  • Tight die-cutting for easy image positioning.
  • Large clear blocks can be used to create collages or spell words with alphabet sets.
  • Stamps store easily in standard, DVD-type cases with artwork on front and spine, making organization easy.
Item 
Description 
AU Price 
118487 
Block A (3 x 3.2 cm)  
$5.95
117147 
Block B (4.1 x 4.9 cm)  
$7.95
118486 
Block C (5.1 x 5.7 cm)  
$9.95
118485 
Block D (7.3 x 6.8 cm)  
$13.95
118484 
Block E (8.7 x 11.3 cm)  
$23.95
118483 
Block F (12.4 x 15.2 cm)  
$33.95
118489 
Block G (6.4 x 1.9 cm)  
$6.95
118490 
Block H (11.3 x 4.1 cm)  
$13.95
118488
Block I (14.9 x 5.7 cm)  
$23.95
118491 
Block Bundle (Blocks A-I)  
$126.95 


In this video, Bonnie Thurber talks about Stampin'  Up!'s clear-mount rubber stamps and why you'll absolutely love them! (not  all products shown are available in all markets)


Click arrow to view Stampin' Up! Clear Mounts Video.

Big Shot Die Cutting Machine


There's a new big shot in town--the Sizzix Big Shot for Stampin' Up! The Big Shot is a sturdy manual die cutting machine used to die cut materials for use on crafts, home décor projects, and even clothing--it's a big deal! You'll love what the Big Shot machine--a six-time winner of Creating Keepsakes Reader's Choice Award for best die cutting equipment and dies--can do for you. 

Design your own custom pillow appliqués using the Scallop Circle Bigz die or make custom fabric flowers to embellish a quilt. From sewing to quilting to home décor, the Big Shot is the perfect tool for many types of crafting. The wide appeal to various types of crafters will help you expand your business in new circles. The Big Shot makes incorporating paper crafting into these customers' hobby an easy progression. Use our Stampin' Up! exclusive dies to create die cuts and stencils with our artwork and designs for all your craft needs.

Planning and preparing Make & Takes is fast and economical with the Big Shot machine. Cut out eight of the same chipboard letter or 20 scalloped pennants in just a few minutes. You'll be able to cut and score 3-D items in seconds, and the projects will be ready for your customers to enjoy. Or create embellishments for cards, scrapbook pages, or any other type of project by cutting multiple images at once. 


 *   *   *

Big Shot-Approved Materials

Big Shot Materials List for Bigz and Originals Dies
The following materials work well when creating die cuts with the Big Shot machine and Bigz and Originals dies. Please note the maximum thickness of several materials. As a rule of thumb, you can cut a material with your Big Shot machine and Bigz or Originals dies if you can cut it using your Craft & Paper Scissors.

  • Thick corkboard
  • Thick chipboard (59 mil)
  • Colored magnet
  • Ruffle board
  • Paper wood
  • Balsa wood (3/32")
  • Bass wood (1/16")
  • Metal mesh
  • Aluminum (.016)
  • Tin (.008)
  • Adhesive and non-adhesive mat board
  • Drawer liner
  • Shelf liner
  • Vinyl
  • Static cling vinyl
  • Shrink film
  • Fine sandpaper
  • Clear acetate (20 mil)
  • Vellum
  • Card stock
  • Patterned paper
  • Flocked paper
  • Contact paper
  • Textured paper
  • Metallic paper
  • Linen paper
  • Suede paper
  • Embossed metallic paper
  • Basketball embossed paper
  • Faux alligator textured paper
  • Self-adhesive glitter paper
  • Fabric
  • Canvas
  • Iron-on fabric
  • Soft plush fabric
  • Burlap
  • Velvet
  • Corduroy
  • Lace
  • Heavyweight denim
  • Terry cloth
  • Funky fur
  • Thin leather
  • Quilt batting
  • Warm & natural batting
  • Fusible fleece
  • Self-adhesive craft metal
  • Self-adhesive cork
  • Self-adhesive foam
  • Self-adhesive magnet
  • Self-adhesive felt
  • Adhesive and non-adhesive rubber
  • Pop-up sponge
  • Poly foam
  • 100% pure beeswax (cut with parchment paper on top & bottom of beeswax.)
The Big Shot works with ALL competitive dies, and the steel rule dies can cut through an impressive list of 50 different materials, including fabric, foil, and chipboard.


*   *   *

Premium and Extended Crease Pads

We recommend the Premium Crease Pads and Extended Premium Crease Pads when using rule-based dies with score lines. The crease pads provide a flexible cutting surface that produces clean cuts and well-defined score lines. When using the crease pads, you should layer your sandwich to pass through the Big Shot in the following way (starting from the bottom):
  1. Standard or Extended Cutting Pad
  2. Shim (optional)
  3. Die, blade up
  4. Material to be cut
  5. Premium or Extended Premium Crease Pad*
Shims are used to add thickness to the sandwich passing through the Big Shot machine, applying more pressure to the die and resulting in deeper score lines and embossed images. Plastic shims are included with each crease pad, but you can also use text-weight paper or card stock as a shim.
The necessity of shims will vary among users. Due to the tolerable variances in the measurements of all products associated with cutting, results can slightly differ depending on the material being cut, the die being used, or even from one Big Shot machine to another. You should experiment to identify what works best (shim, no shim, extra shim, etc.) for the material you are cutting and the die you are using.
*Use the Premium Crease Pad with Originals or Bigz dies. Use the Extended Premium Crease Pad with Bigz XL dies.


Big Shot


Click onto arrow to view Stampin' Up! Big Shot Video

If you want to learn how to use the Big Shot, you can come along to one of my Open House Days or book a workshop and earn free products.  Contact Sandra for bookings HERE.

Stamps


In Stampin' Up!'s Idea Book and Catalogue, you'll find exclusive stamp sets that are unrivaled and unavailable anywhere else in the stamping world. With deeply etched images on foam-backed rubber that ensure sharp and clear stamped images, it is no wonder that our stamps-renowned within the stamping industry- earned the 2007 Creating Keepsakes' Readers' Choice Award for best rubber stamps-for the sixth year in a row!

Stamp Assembly
Trim rubber close to image. Make straight cuts.
Match rubber to correct blocks. Trim and apply labels.
Apply rubber, matching position of rubber with label.
Apply label with stamp set name to the end of the box.

*PLEASE NOTE MOST STAMPIN' UP! RUBBER STAMPS ARE LAZER CUT.  (No cutting required).


Faux Metal

Directions:
  1. Apply VersaMark over entire piece of card stock using the direct-to-paper technique. Sprinkle embossing powder over image (Figure 1).
  2. Melt powder using heat tool. Sprinkle on additional powder while the image is still hot, and reheat. Repeat up to three times (Figure 2).
  3. Press clean image into warm layers of embossing powder to create image (Figure 3). Punch or cut out image, and adhere to card.
Tips:
  1. Experiment with solid and line images to achieve multiple looks, from impressed to raised.
  2. Try sanding the surface of your faux metal image to create a scratched look

Definitely Decorative


With Definitely Decorative stamping, you can create custom interiors at a fraction of the cost. Customize your home décor by stamping walls, fabrics, and other furnishings to give them an entirely new look. You'll also love how easy it is to create hand-stamped, framed art. Use any stamp set and colour palette to create custom home accents for any season or occasion.

Stampin' Memories


You may not realize it now, but your friends and family will be forever grateful to you for preserving your memories. Explore the variety of options Stampin' Up! provides to help you capture any theme or occasion. With Stampin' Up!, you can preserve your memories so that your family will enjoy reminiscing and poring over your albums in the future. Try our alphabet sets, font CDs, Simply Scrappin' Kits, Designer Series papers, quality albums, and more.

Cards and More


Card makers have long appreciated Stampin' Up!'s diverse product line, but cards aren't the only projects you can create with our products. In addition to cards, you can create scrapbook pages, home décor, wrapping paper, books, journals, and other unique projects. Whatever you envision, Stampin' Up!'s stamp and accessories will help you transform all your projects from ordinary to extraordinary.

Colour Families


Stampin' Up!'s large collection of accessories is based on a foundation of our four exclusive colour families, along with neutral colours to enhance them. Because most of our products are designed to complement each other, we've taken the guesswork out of colour coordination.   Each of our exclusive colours is organized into one of our colour families: Brights, Regals, Subtles, and Neutrals collection.

Stampin' Around


Nothing is faster, easier, or more versatile than our Stampin' Around wheels! Because many wheels complement images in our stamp sets, you can use wheels and stamp together to create beautifully coordinated projects. And with Stampin' Around ink cartridges available in many of our exclusive colors, your wheeled images will also coordinate with our card stock, eyelets, and more.

Two-Step Stampin'

 
Create a single, multicoloured image with Two-Step Stampin'-simply layer one image over another for fast and easy stamping with amazing results. The Two-Step Stampin' logo marks these sets in the catalogue.

Step 1: Stamp the base image in a light colour.

Step 2: Stamp the outline image in a darker colour.

. Faux Shaving Cream

  Directions:
  1. Ink a wheel with a solid-texture image (Figure 1). For example, you would want to select a bold wheel rather than a wheel with a line art image; the more lines on the wheel, the finer the texture in the image.
  2. Ink a bold stamp. Don't worry about making sure that the stamp is evenly covered (Figure 2).
  3. Once your stamp is ready to go, kiss it with your wheel by swiping the wheel on the stamp. Twist your wrist as you tap, or use a side-to-side motion if you swipe (Figure 3). The key to creating the marble swirl is in this movement.
  4. Stamp your image on your project (Figure 4).

Tips:
  1. Try experimenting with two- or three-color combinations for beautiful results.
  2. You can achieve a lovely marbled effect with only one color, by kissing your stamp with an uninked wheel.

Spotlighting with Punches


Directions:
  1. Stamp desired image on two pieces of card stock (Figure 1). Set one aside to serve as background for spotlighted image.
  2. On the first piece of card stock, watercolor the area you wish to highlight (Figure 2).
  3. Line up punch with watercolored spotlight area (Figure 3).
  4. Line up punched, spotlighted piece with the previously stamped image on second piece of card stock (Figure 4). Mount on coordinating card stock for completed project.

Heat Embossing and Emboss Resist

Experience these lovely techniques yourself by booking a free workshop with me and invite your friends along to gain free gifts and rewards.  Book a workshop and contact me today!  
Click HERE.


Technique A:  Heat Embossing 

1]   Place your card stock in a Powder Pal tray or over a large piece of scratch paper.
2]   Rub the Embossing Buddy across the card stock you want to emboss
(this keeps the embossing powder from sticking anywhere but on the ink). 
3]   Stamp the image with Craft, VersaMark, or embossing ink.
4]   Pour powder onto the inked image, making sure that the image is coated completely. 
5]   Shake off excess powder into the tray and funnel it back into the container.
6]   Heat the stamped image only until the powder changes to a shiny liquid and rises.
7]   Allow embossed image to cool.

Technique B:  Emboss Resist 

1]   Follow steps 1-7 above, using Stampin' Emboss clear embossing powder.
2]   Apply ink with a sponge directly to the paper over and around the embossed image.
3]   Wipe the embossed image with a tissue to remove the excess ink.

QUICK TIP Avoid overheating the powder and burning the paper when working with a heat tool.

Sister Birthday Card


MATERIALS

Stampin' Up Stamps Sets
Good Friend -  115816
Petal Pizzazz -  115850
Occasional Greetings -  115932

Stampin' Up Card Stock
Whisper White A4 - 106549
Pixie Pink

Stampin' Up Classic Ink Pads
Green Galore - 102122, Pixie Pink - 105212, Real Red - 103133,
Chocolate Chip - 100908, Tempting Turquoise - 100814

Stampin' Up Tools
Paper Snips (scissors) - 103579
Snail Adhesive - 104332
Glue Dots (Pop-Up)  - 104183


Masking


1] Stamp image on card stock.
2] Stamp image again on a piece of scratch paper.
3] Cut carefully around the scratch paper image, cutting just inside the lines; this will be your mask.
4] Place the mask on top of the card stock image.
5] Stamp another image over a portion of the mask to create layered, interacting images.
6] Remove the mask to see the finished look.
7] To stamp a partial image, use tape to cover the part of the stamp you don't want to appear, ink the stamp, remove the tape, and stamp the image.

QUICK TIP To ensure that the mask stays in place, stamp image on a Post-It® note.

Shadow Rolling


  Directions:
  1. Roll wheel on scrap paper until the entire wheel is completely inked; begin with the darker ink first.
  2. Find the seam on the wheel (Figure 1), and position it even with the edge of the paper (Figure 2).
  3. Carefully roll the image onto the card stock.
  4. Clean off the wheel, and insert a Whisper White cartridge, and ink your wheel again.
  5. Locate the seam again (Figure 3), and place it slightly before the spot where you began on the first roll (Figure 4).
  6. Carefully roll the lighter image on top of the darker image, creating a wonderful dry-embossed look (Figure 5).
Tip:
  1. For perfect positioning, the Stampin' Around Wheel Guide is a handy tool.

Reverse Spotlighting

 
Directions
1. Stamp images in Basic Black ink. 
2. Punch random holes in stamped images (Figure 1). 
3. Stamp and cut out the same image on pieces of colored card stock (Figure 2). 
4. Line up and mount images behind punched holes (Figure 3). 
5. Trim overlaying images with scissors or paper cutter (Figure 4).
6. Mount images into place for completed project (Figure 5).
 

Remote Control Card


Playstation3 Remote Control Birthday Card.


Fold black card stock to fit the template, the two flaps at the top should be scored and flipped back to the other side of the card.

Make sure the top part of the template is lined straight down with the folded part of the card. Trace the template and carefully cut to shape.


Flip the card around, see were the arrows is pointing trace the two flaps to form the triggers for the remote control and on that side only use a Stanly knife to cut the shape so they can flip up.


This is how it looks when the card is opened and standing upright, the two flaps are still down at this point.


Use 1", 1.5" and 2" circle punches on black card stock to make two sets of circles.


Layer the 2" circles down first with 3D foam as shown.  

Next add the 1.5" circles with 3D form and attach to the card. 

Before adding the two 1" circles cut two small pieces of paper into rectangle shapes and fold them to make the springs for the toggles.  

Then add double sided tape between the 1.5" and the 1" circles to attach the springs as shown by the arrow.  

This way the toggles have a bit of movement.


With the toggles sticking out and the triggers popping up from the card, the remote control is starting to take shape.


Make two cross shapes with double sided foam tape onto black card stock.


Cut around the tape leaving room right around this shape.  

Turn them around and add each shape to the center of the 2" circles.


On the left hand side of the control there are four small buttons and four small arrows.

I cut them out from black card stock and used the Xyron to add adhesive to the back of each piece and added them onto the remote control.


Add a rectangle and triangle shape with black card stock to the center of the control and with white gel pen add the words Sony, Select, Start.

On a small circle with black card stock add the control symbol placing this at the lower part of the control.

Then to finish the job on the left side of the control add symbol's X, circle, triangle and square with white gel pen.  

For template of the remote control click here.

New Arrival Baby Boy


Cut Stampin Up - Tempting Turquoise card stock 15cm x 17cm.

With the same colour marker stamp yeah, baby from A little Love set by Stampin Up around the card.


Cut a small piece of Stampin Up - Tempting Turquoise card stock 8cm x 11cm.

With the same colour marker stamp around the card stock with baby hand prints by Kaiserstamp.

Put this aside for later.


Cut smaller piece of card stock by Stampin Up - Whisper White 6cm x 7cm.
Stamp Happy New Baby from the Greetings Galore set by Stampin Up with Stampin Up Classic stampin' pad - Basic Black ink pad onto the white card stock .

With a watercolour brush use the Classic stampin pad - Tempting Turquoise and Close to Cocoa ink pads to colour the image.

To distress the white card stock use Stampin Up Cutter kit to distress then ink around the edges with Tempting Turquoise ink pad.

You can mount this to the baby hand prints with double sided tape.


Before adding image to the base of the card add the black spotted ribbon to the card by slitting a cut at the scored end of the card for the ribbon to fit through then tie the ribbon to make a bow and cut to size.

Add 3D foam to the back of the baby hands print card stock and mount this to the card.

Remote Control Birthday Card


With Brad's 12th Birthday approaching I wanted to make something different, something his into at the moment and as I was tidying up I happened to pick up a remote control and it hit me-a light bulb moment to make a remote control birthday card.  I went to work on it straight away.   To see the tutorial click here and the template click here.

Remote Control Birthday Card Template


Playstation 3 Remote Control
Birthday Card
Template

New Arrival Baby Boy


Materials
Stampin Up Stamp Set
Greetings Galore
A Little Love
Stampin' Up A4 Card Stock
Whisper White-106549
Tempting Turquoise-108598 
Stampin' Up Classic Ink Pads
Basic Black-101179 
Tempting Turquoise-108598
Stampin' Up Products
Snail Adhesive-104332
Stampin' Dimensionals-104430
Aqua Painter-103954 
Other Products
Blue spotted ribbon 
Hand print stamp 
Markers 
 
Baby cards were a challenge for me but with the right stamps it turns into a project.
I used markers and a watercolour bush Aua Painter to colour the image.
To see a step by step tutorial on how to make this card click HERE.


Two-Step Stampin' and Stampin' Off


Technique A: Two-Step Stampin' 

1]   Stamp the base image.
2]   Position and stamp the overlay or adjoining image.

QUICK TIP Use lighter ink for the base image and darker ink for the overlying image.

Technique B: Stamping Off 

1]   Ink a stamp.
2]   Stamp the image.
3]   Restamp the image one or more times without re-inking it. 
This technique is a great way to get several shades of colour from a single ink pad.
 
QUICK TIP Use Stampin' Off to simulate movement on your card.